!!! This is a SiteProxy proxied website, do not enter your personal information. Refer to: https://github.com/netptop/siteproxy for details !!!×
Showing posts with label Geometry Lessons. Show all posts

5.08.2024

Parts of a Circle Vocab Project

I wanted a hands on way for students to learn the parts of a circle. Since I have small class sizes, this was not a big expense to get the supples.

  • paper plates
  • pipe cleaners/chenille stems
  • circle stickers
  • straws
  • rectangle stickers
  • hot glue gun

Here are the directions:


The back of the directions had a place for them to practice naming the parts of their circle as well.


My mistake was buying giant paper plates that the pipe cleaners weren't long enough for so just buy the basic cheap ones.


9.04.2018

Special Right Triangles: Tic-Tac-Toe Method


I've always taught special right triangle by comparing similar triangles, writing proportions, and cross-multiplying. Last year I tried this investigation for the first time that also doubled as a project with mixed results. I tried it again this year but without the project piece. And I'll be honest, this year I walked around giving some hints and last year I didn't help at all. Why? Because I felt like my class was so needy and had to start learning to be more independent. This year I didn't let them talk until they had finished the whole page front and back. Then I asked them to compare with at least two other people. That part went really well.

Then we went on to basic INB notes. Some students really took the lead in shouting out what to do. While it wasn't cross-multiplying, they were using patterns and it seemed to work.

And then...

A student asked this question on Friday and I told him I would find out and explain Tuesday.

Which led me to this:

I really loved her materials but I had already 'investigated' the patterns and already had INB notes. What to do....

Strips to the rescue!

We made a Math Tools pocket at the beginning of the year and added calculator strips. I turned her charts into strips and we used them to practice with dry erase markers and then write in the answers.


I color coded the 'levels' that Katrina mentioned in her post.


Using the tic-tac-toe method, we decided first which column the given information goes in and then how to solve for x. This really helped them see when we need to multiply and when to divide. Once we had x then we could fill in the other two columns.

Two students figured out shortcuts to the patterns without doing the work. I explained to them that that was my goal but when I led with that in the past, everyone would get confused and so I need to teach a structure that EVERYONE can fall back on.

I felt like this really cleared things up from where we left it on Friday. Next time I teach it I will do the strips right after the investigation and then they can use the strips as a reference for the INB notes.

Thanks Katrina!

8.29.2018

Odds and Ends


I've used this activity for the past few years, using foam circles from Dollar Tree that I labeled with sharpies and stuck up all over the room.


My ceilings are too high to reach and I felt like that always threw them off. This year I got the bright idea to cut up tissue boxes and use blank yard sale stickers.


I gave them the worksheet with a picture on it too and asked them to make sure the stickers were in the right place. Sadly they were nowhere near sticky enough and repeatedly fell off. Now I feel like I need some laminated circles and hot glue them to the box. Any better suggestions?

This was the last activity before their quiz. After like 6 DAYS of point, lines, and planes, the grades were still bad. I think the highest was an 86% and the majority of the class was between 50%-75%. Why is this so hard? It's like the more time I spend, the worse it gets. I hate that it's the first lesson of the year because it drags on forever, they get a bad grade, and then they decide that geometry is too hard and they're going to fail.


Moving right along....

I used this 'number line' to introduce absolute value equations.


Questions I asked:
  1. What is something weird or unusual about this diagram?
  2. What is something familiar about it?
  3. What kind of math thing could it represent?
  4. If the pink magnet was a number, what would it be?
  5. What is three magnets away from the pink magnet?
  6. Why are there two possible answers?
  7. What is two magnets away from the star?
  8. What could the magnets represent?
  9. Can you have a negative distance?
  10. What is the definition of absolute value?
This was done in about 2 minutes and then we jumped right into INB notes.

And here's a fun video of us playing Grudge Ball but I call it The X Game because there are no balls and there are X's.


Any time they run to the board, it's a win. =)


8.25.2018

Points, Lines, and Planes...Help!


This is Skill #1 in geometry for me and we can all agree that it's super important and full of so many little details. Over the years I have come up with so many ideas to tackle this skill with and I still don't really feel successful.

One of my favorite activities is what I originally called my hands-on naming review. I made segments and arrows out of pieces of pipe cleaner and little fuzzy balls and cut letters written on construction paper.

This year I tried the same activity with play dough and letters I cut out from my Silhouette Cameo. The students really enjoyed it but it took much longer for them to roll up the play dough and make all the pieces. I felt like they weren't really paying attention to the symbols or notation and it was like pulling teeth to get them to refer back to their notes.

So I thought I would share what I did and see if you have any feedback. I need a better flow and to shorten up how much time I spend but hopefully in a more efficient way.

First I did blind sketch; students describe a drawing to the other person and they draw it without seeing it.


We made a list of all the vocabulary words they used while describing the pictures.


Then I had them sort this cut up answer key from a graphic organizer.


The next day I passed out this page for their INBs. The left side is the 'answer key' to the card sort so they could compare their work. The right side we filled in together.


Here is the hands on naming review:


And some play dough pictures:


Next I plan to do this worksheet activity with the tissue box model below.


I thought I would follow up with a Kahoot and another worksheet that I don't have a copy of.

I've also used this in the past:


What am I missing?

What am I not doing enough of?

What is the magic key to unlocking the unicorn dust of points, lines, and planes?


7.11.2016

SOS: Open This Up


Currently reading Mathematical Mindsets by Jo Boaler and continuously stewing over some geometry problems I 'taught' last year.

I need your help.

I did numerous examples with students and students did numerous examples with each other. But I don't know that I actually taught them how to problem solve. To me, these type of problems are very intuitive. How do I make students feel that way?

I didn't give students anything to figure out. I did an example for them, then asked students to do an identical example with different numbers. I didn't ask students to notice or wonder anything. I didn't ask students to think about any patterns.

This has literally bothered me for over two months now. When I would 'help' students and ask them if they had checked their notebook, more than one told me "My notebook doesn't help me." Looking at worked examples was not helpful because I didn't give them anything to make meaning out of. There was nothing to help them do the problems.

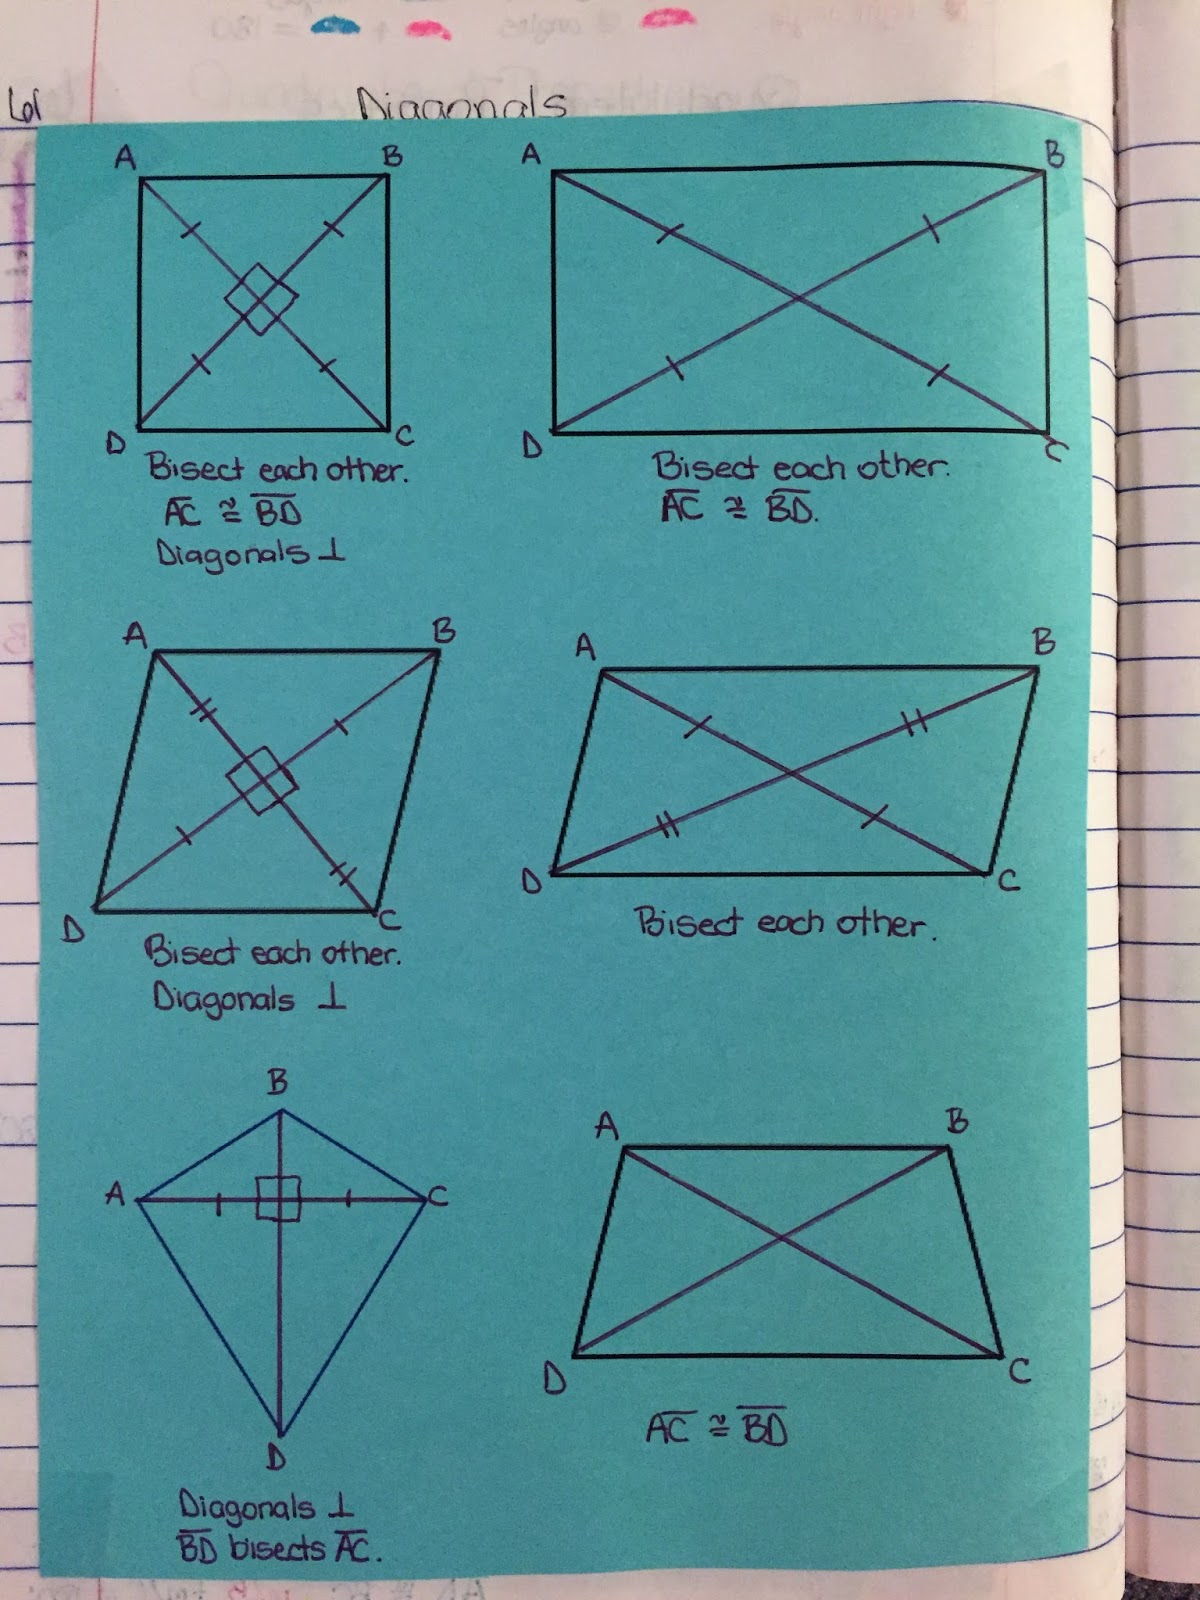
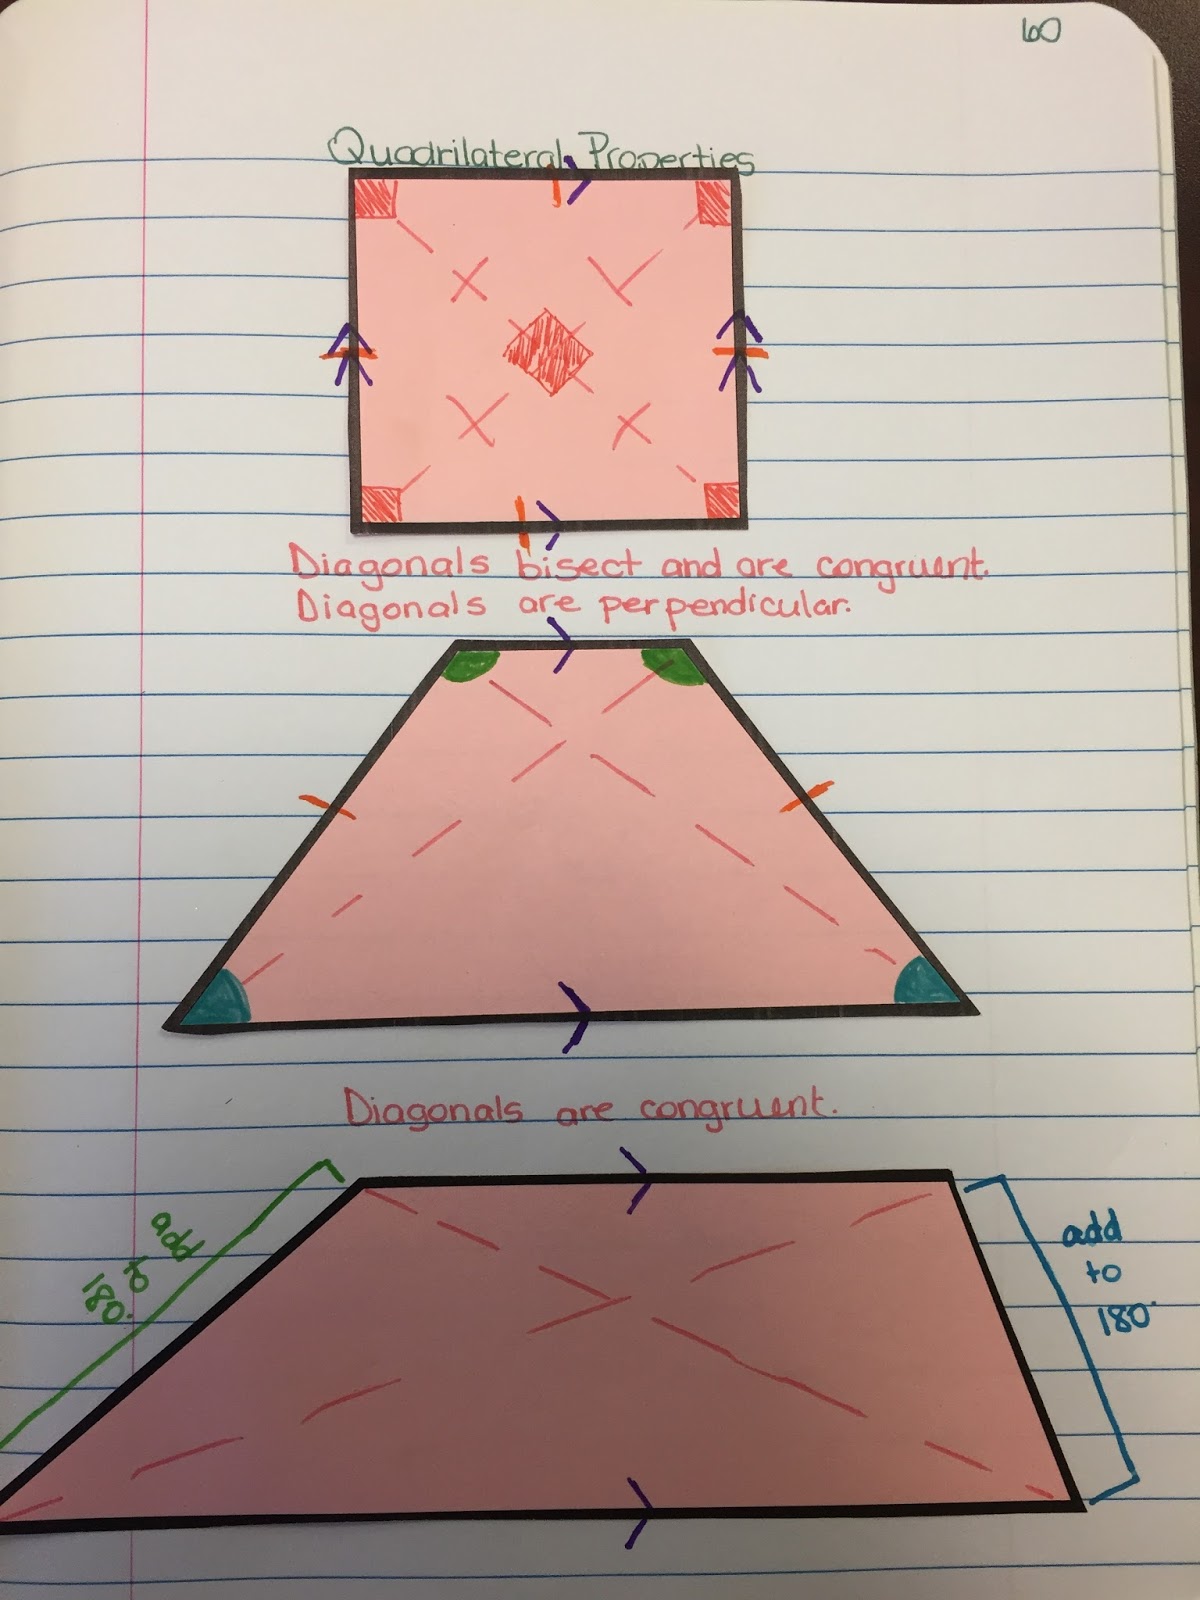
Problem Type 1: The Rectangle


It's easy enough for students to figure out and remember that the opposite sides are equal. It's also pretty normal for them to know the diagonals are equal to each other and you can even cut them in half. Then it's pretty easy for them to agree that alternate interior angles are equal. It's a step up for them to know intuitively that each vertex is a 90 degree angle and actually be able to find the measures of the alternate interior angles. It's a bigger step up to realize this diagram contains 4 right triangles and that you need to use the Pythagorean Theorem to find the side lengths or diagonal length. And then piling more and more steps....Angle EDA is the same as angle EAD because there's also an isosceles triangle in here..Then we can use the triangle sum theorem to find angle AED. 

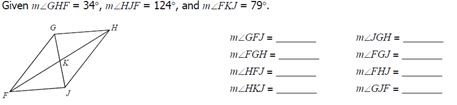
And then there's the leap to giving them 3 values and asking them to find 8 other values while also switching back and forth between sides and angles.

Problem Type 2: The Parallelogram


The parallelogram jacks up everything. The diagonals aren't congruent anymore. The opposite vertex angles are congruent but no longer equal to 90. There's no more right triangles, Pythagorean Theorem, or isosceles triangles. But we can still find all the same values.

It just seems like so much. So many different values to find using different strategies. The two problems almost undo each other. "Hey, you know all those things you just figured out? Yeah, they no longer apply and will mess up everything if you try to use them."

How do I give students an experience or notes to look at that actually explain to them how to find these values?

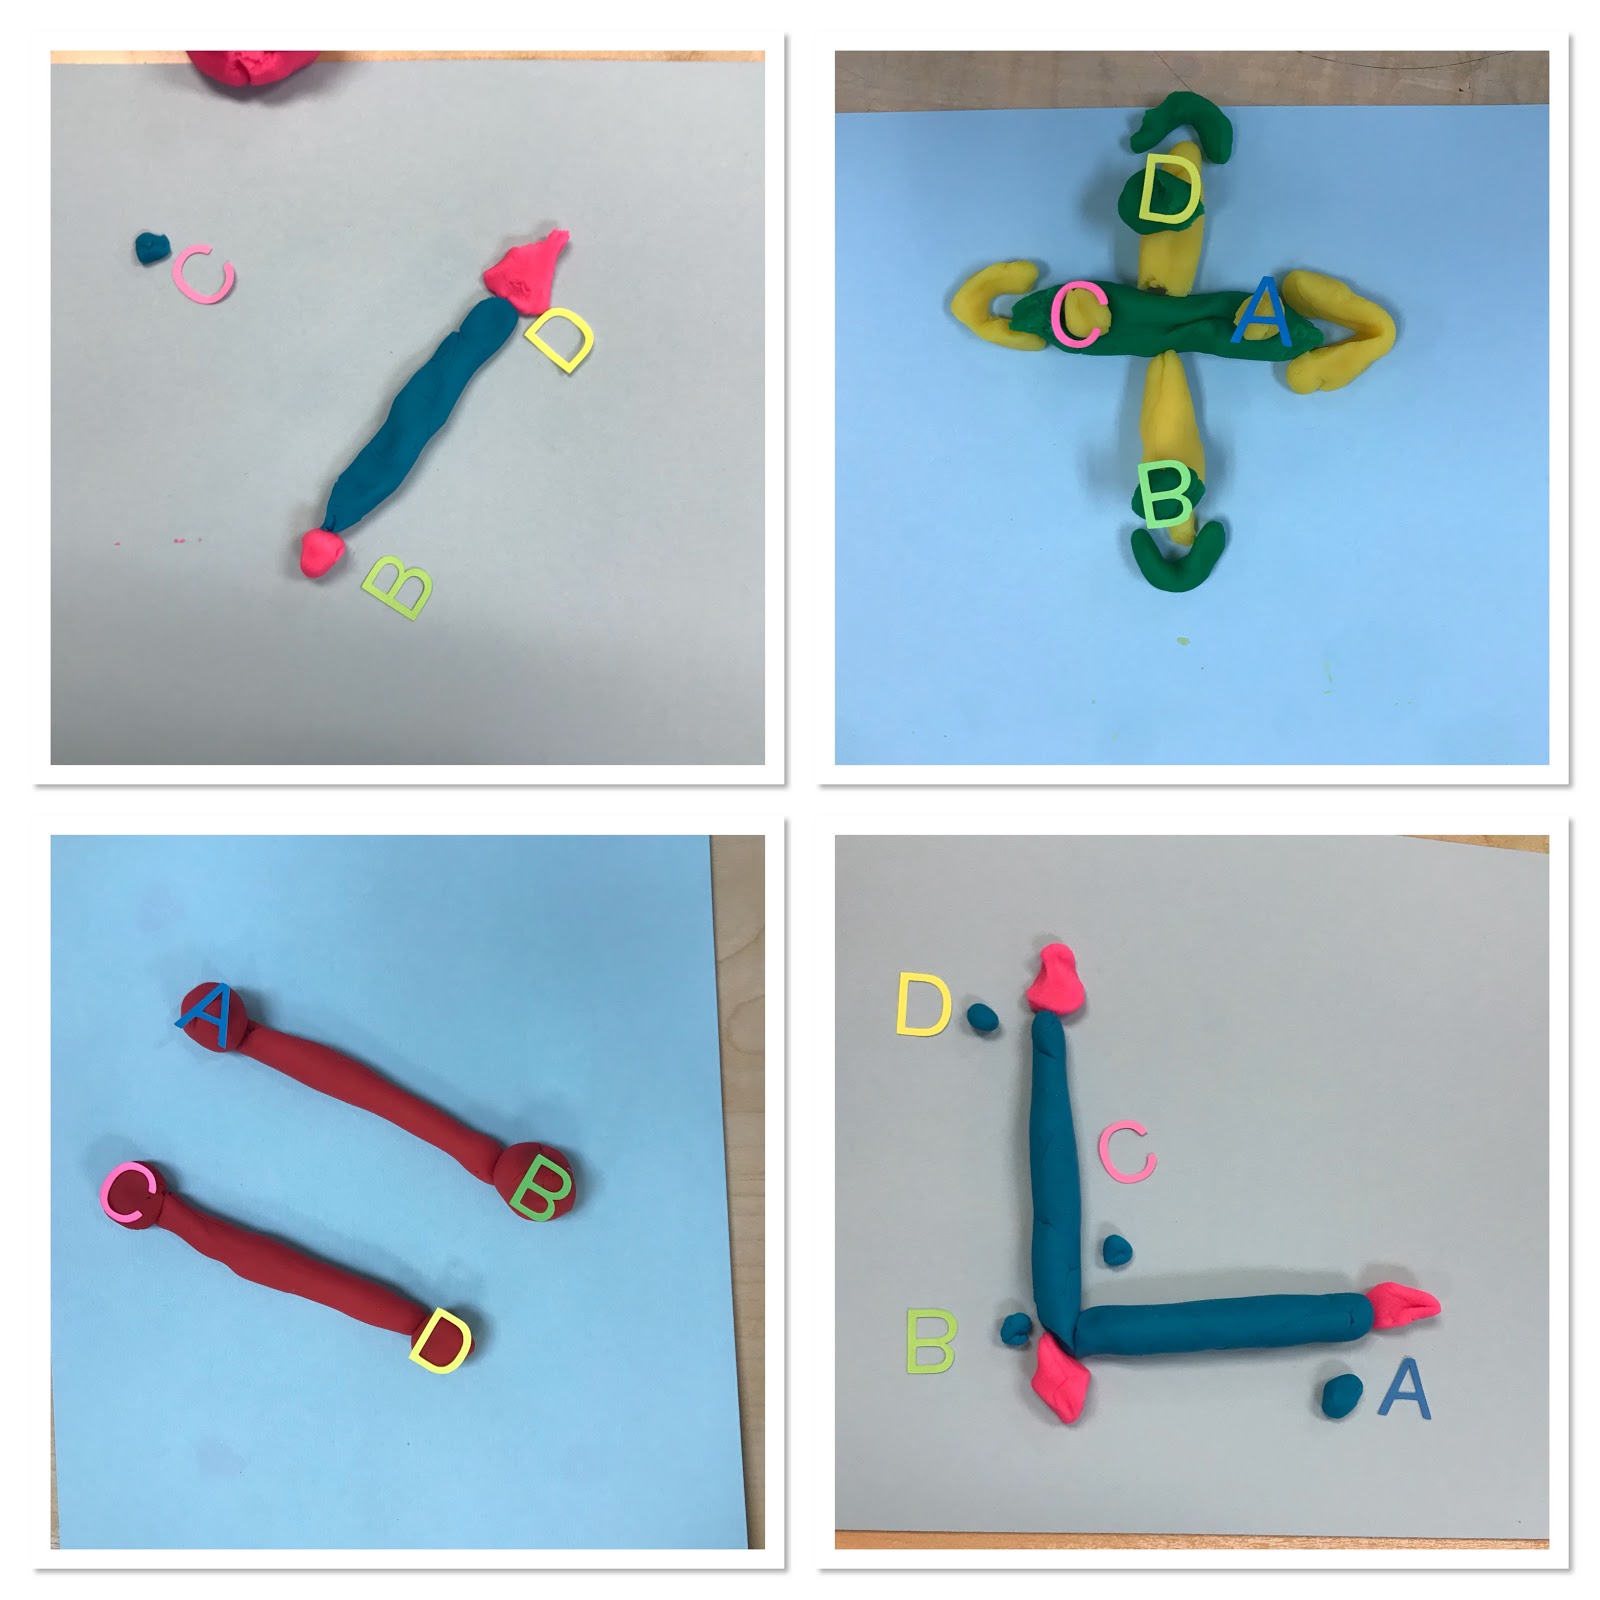
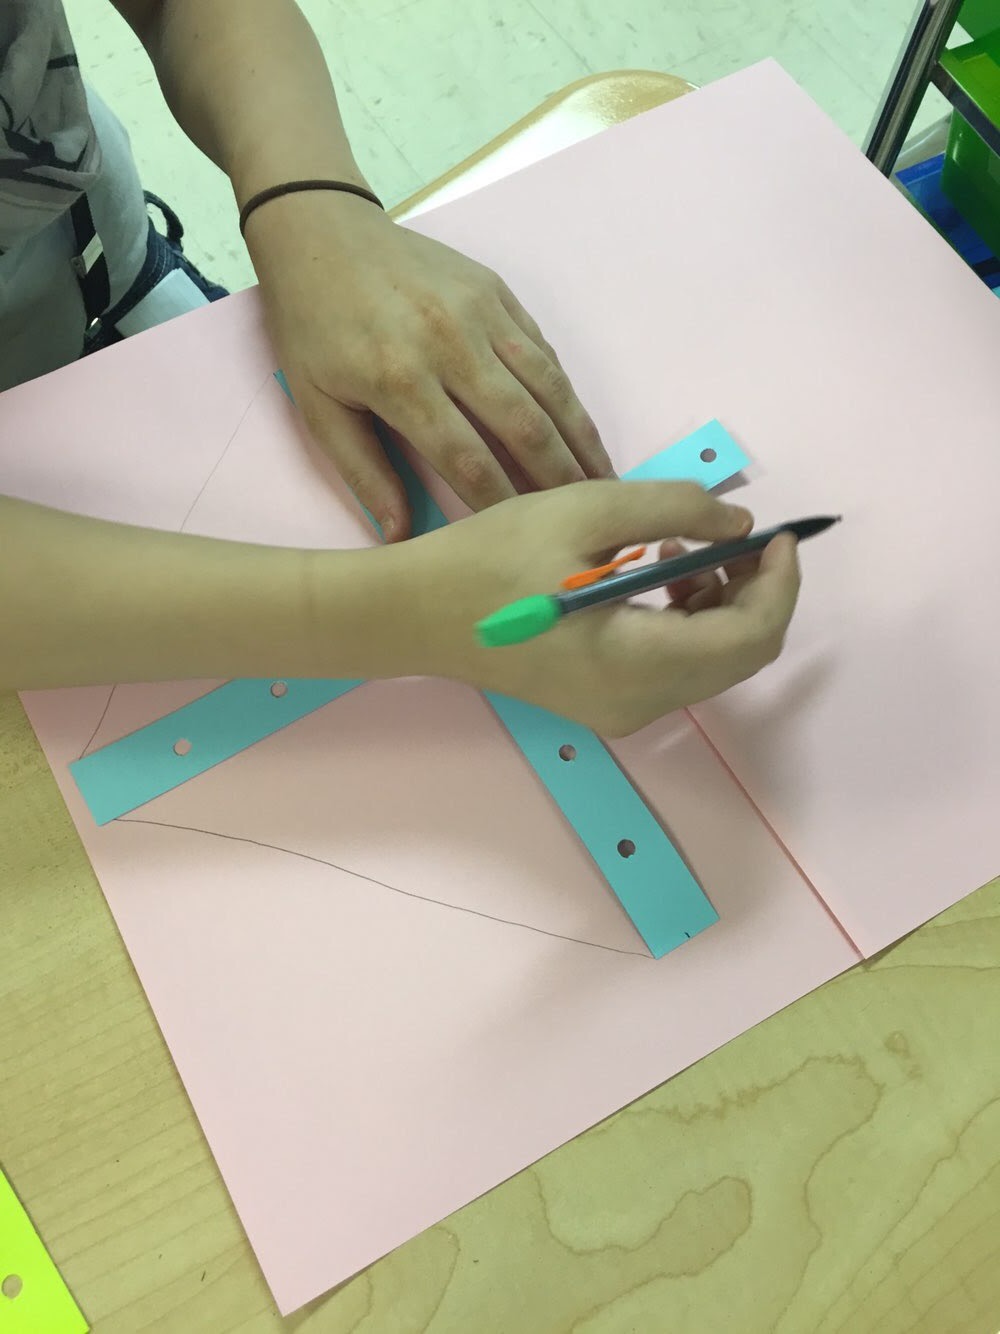
All I have come up with so far is giving them a variety of diagrams with some values already given and ask them to look for patterns. Then they could write down and color code relationships. I also thought about creating a parallelogram and rectangle that they could cut apart or lift up flaps to write the relationships between them.

How do I make these problems make sense instead of like I am just pulling numbers and strategies and out of thin air? {BTW, why do we say out of thin air like air can be thin or fat? Hmm...}

How do I make this into a puzzle where students can figure out meaningful relationships between angles, sides, and missing values?


5.02.2016

#MTBoS30: Proving Parallelograms Pong


For the first time, in Geometry I taught a lesson about proving quadrilaterals on the coordinate plane are parallelograms.

We used three methods: slope, distance formula, and a combination of slope and distance formula. We never actually used a coordinate plane. I had students sketch the parallelogram and label the vertices in the order of the given ordered pairs.

I want to point out here that it's important to explain how to label quadrilaterals because for triangles, the order doesn't really matter. Now it does, and mixing up the letters can change a side to a diagonal and really throw them off.

Then I asked them, what two sides should be parallel or congruent to form a true parallelogram? This gave them a starting point to set up there problems and solve.

To practice, I made my go-to Pong powerpoint (see: all the pongs). It's not awesome because the answers are just yes and no and don't have worked out solutions. But considering that I could find nothing else on this topic, it's better than nothing, Literally.


My original thought was a Desmos activity but I couldn't figure anything out. I think seeing the ordered pairs on the coordinate plane would lead students to just guess yes or no based on it's looks and lose all the motivation to actually work the problem out.

Any ideas?

4.30.2016

Properties of Diagonals


This lesson comes straight up stolen from @pamjwilson. I used it last year for the first time as a full class period lesson. I used it again this year as an intro into properties of quadrilaterals.

She explains it way better than me so you can go read it. Seriously. Go. But I can share some photos from my class and the INB pages we did last year.

This is based off of an activity called The Kite Task but I couldn't find any more information on it other than what Pam posted about.


Here's the literal kite shape. The green and blue 'braces' are two different lengths. Each student gets a combination of three pieces so that they can build with congruent diagonals and without. A gold brad or fastener is used to hold them together and then they trace. Last year we used legal sized pink paper and this year they literally drew on the desk (with dry erase markers).

Next year I'm thinking chart paper and making them go to the board and switch writers each time so that there is more participation. Maybe even a competition to see which group can get the most unique combinations?

Not going to lie, the students struggled with creating different combinations besides the one example of the kite that I showed them to start with. I had a few students who I think had no idea what had just happened at the end of the activity.

A lot of students started by literally tracing the braces so we had to go over the fact that we were looking for four-sided figures.


Last year we did an entire set of INB pages just on diagonals. This year I incorporated it with our quadrilateral properties pages. Here are pictures of both.


What other suggestions do you have to make this activity better?

3.16.2016

Geometry Unit 6: Quadrilaterals Interactive Notebook


Pg 59-60 You might have seen this RHP on Pinterest which I modeled it after and tried to use the graphic organizer on the LHP to reinforce things we drew. I did not implement this well because students copied it without discussion. For some reason, I thought they would look back and get all this meaning from it when we didn't spend any time creating any meaning. =(


Pg 61-62 These pages came after this activity from Pam to reinforce the different properties of diagonals and then using those properties to solve algebraic problems.


Pg 63-64 I know I found theses somewhere online but don't know where. I don't think they were super useful, I think I was desperate for something to use.

After this I also did interior angle sum and exterior angles but I have no pictures to share.

Here are the files:


3.15.2016

Geometry Unit 5: Congruent Triangles Interactive Notebook


Unit 5: Congruent Triangles


Pg 51-52 Introducing the concept of congruence statements and how order and position matter. LHP using a congruence statement to list congruent parts and a triangle that spins to match the position of the original triangle. RHP matching pictures to the correct congruence statement.


Pg 53-54 These pages are all thanks to Shireen. LHP I turned her worksheet into a foldable for deciding which types of postulate applies and the RHP I printed two to page to fit and students name postulate and write a congruence statement- one of my favorite pages.


Pg 55-56 LHP is a checklist of hints for students to use when writing proofs- I don't know how useful it is. RHP is just example proofs.


Pg 57-58 LHP reminds students of what we know after we prove triangles are congruent in order to remember what CPCTC means and when to use it. RHP very basic examples of CPCTC proofs.

Here are the files: